
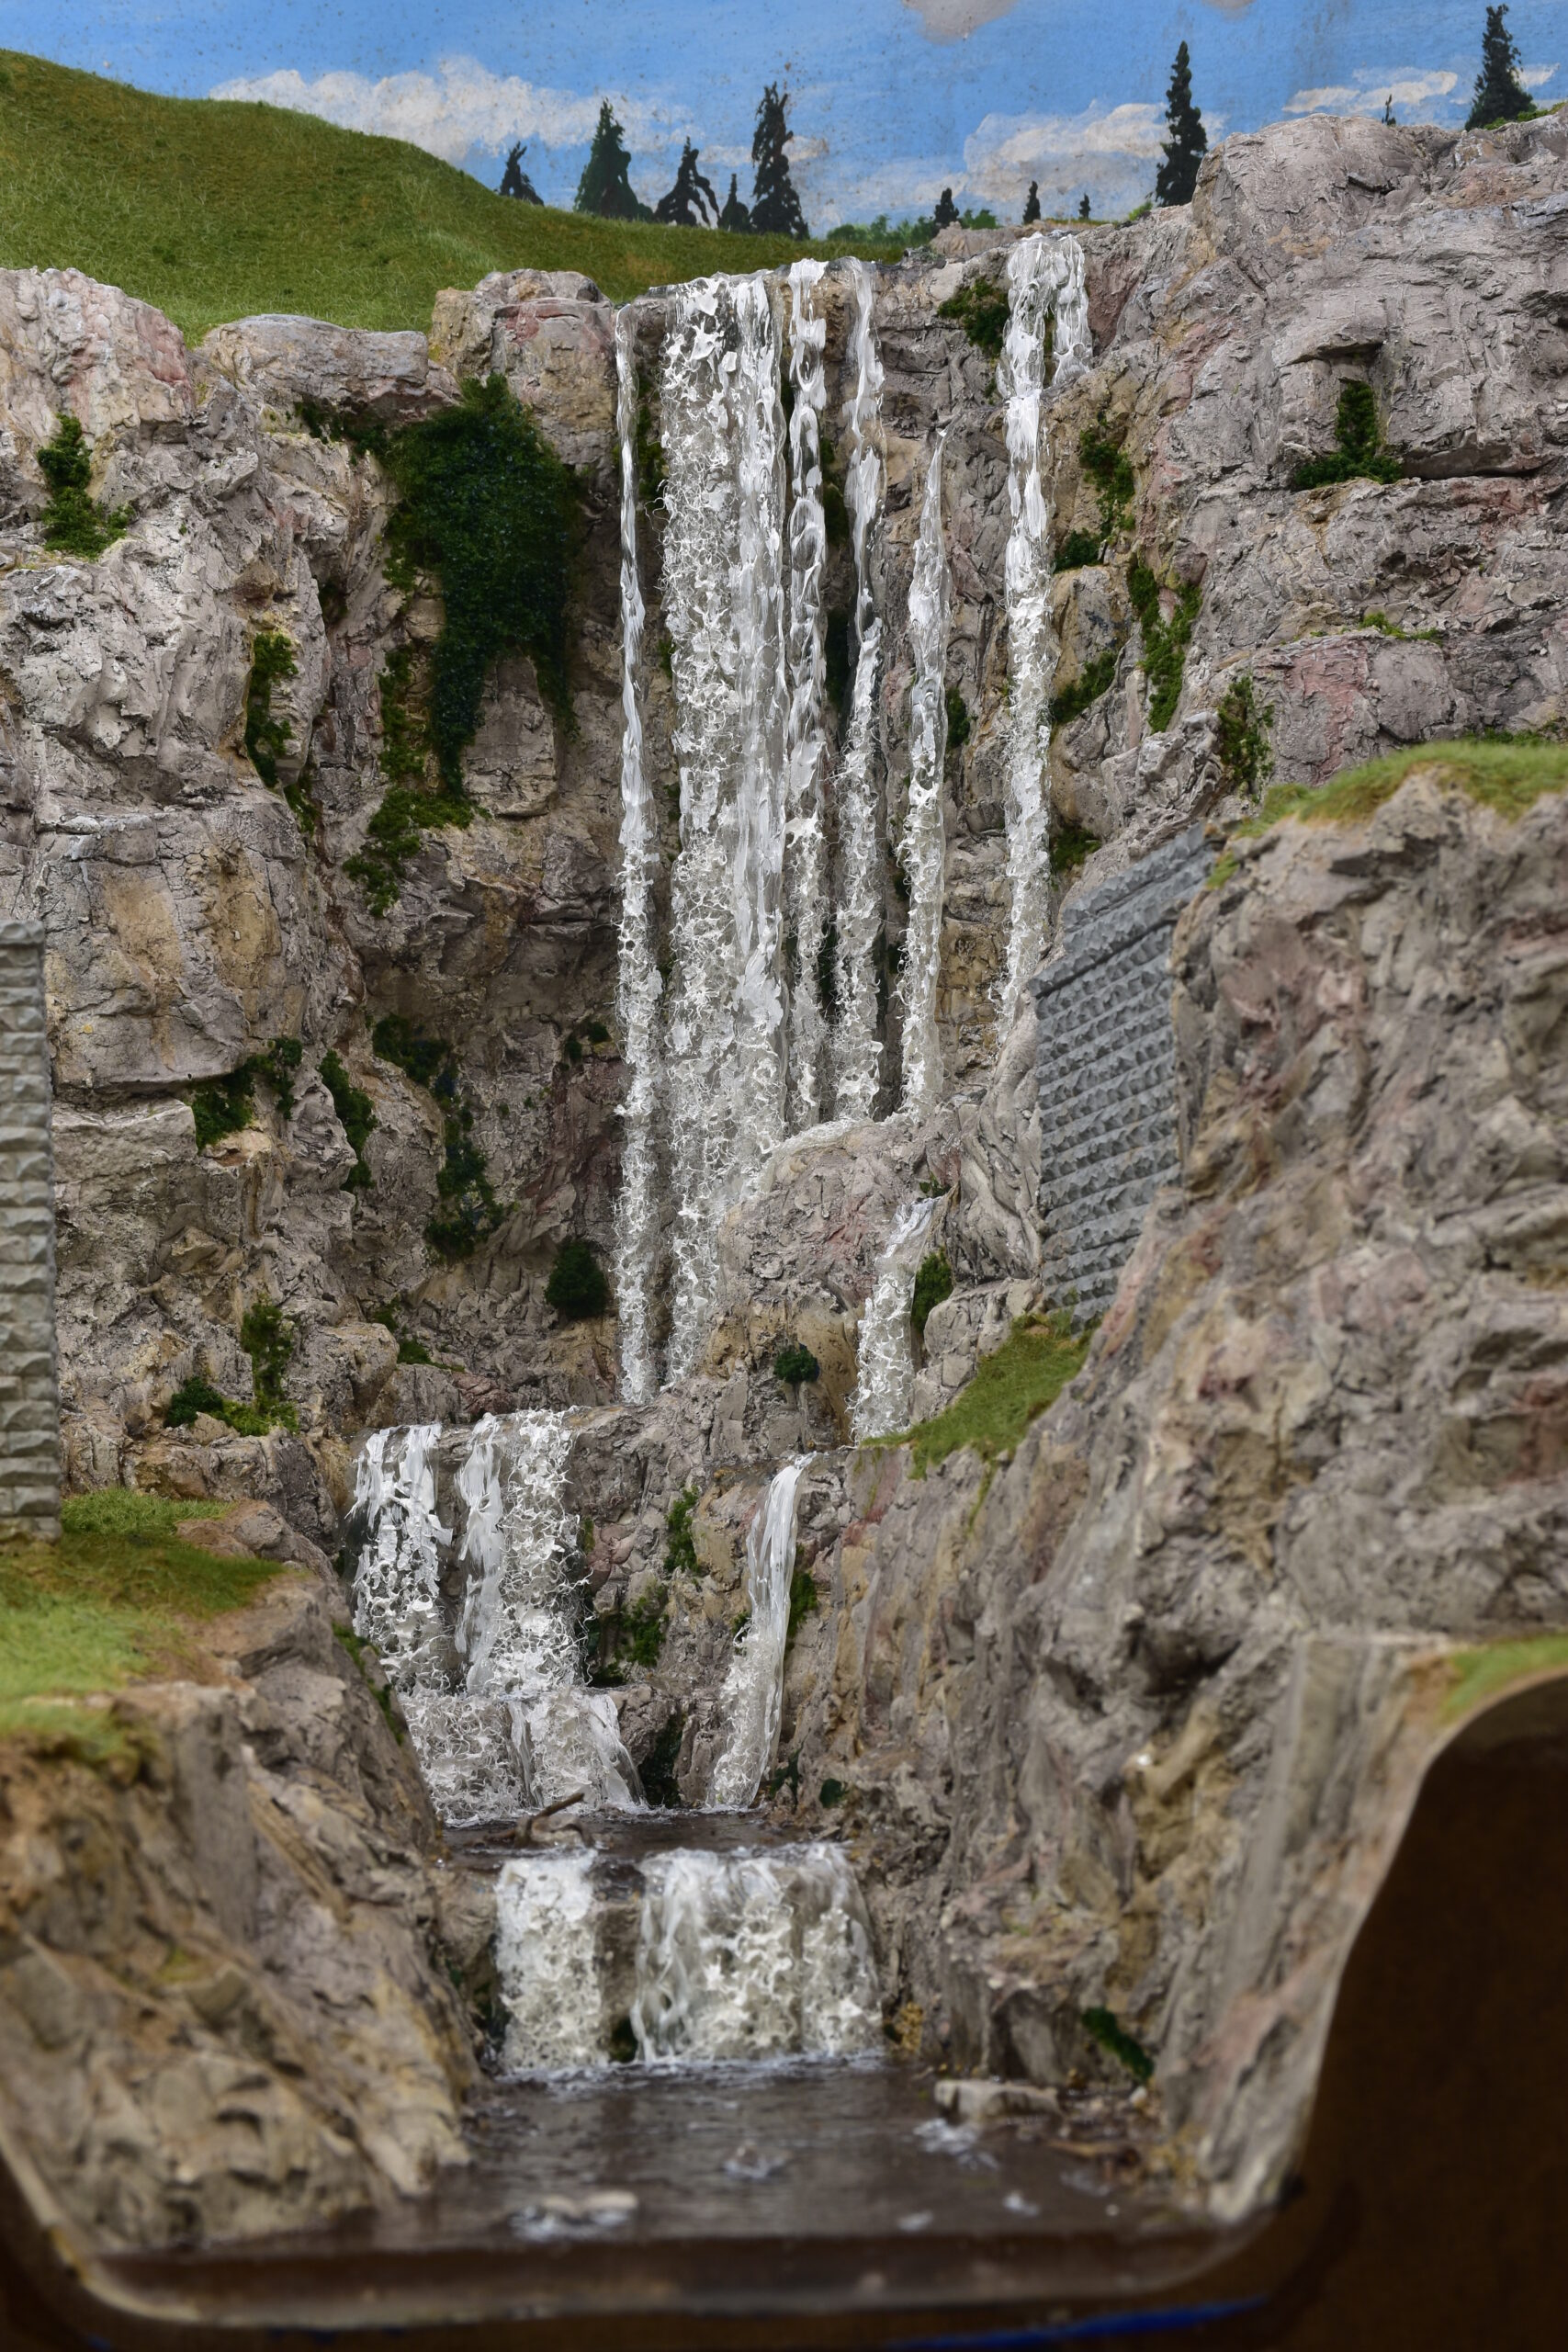

I added some gravel, sand, and rock to the riverbed. I tried to vary the textures and colors. This would be somewhat obscured by the depth of the water which would be Envirotex Lite with some pigment added to murk it up a bit. I tried to keep what should be the deeper parts of the river dark in color. The resin would only be about 1/4 inch deep. I used a bead of Woodland Scenics water effects at the top of each of the falls as a dam to hold back the resin.


I taped off where the river would run off the scene and applied some PVA glue around the edge to make sure there would be no leaks. Just in case, I put plastic on the floor. I mixed equal parts of the resin to get 18 oz. of the stuff, then I added small amounts of blue and brown pigment. This pigment is specially made for use with resins. There was no odor to the Envirotex Lite as advertised.

I used a torch-type lighter to pop the bubbles that always form as the material starts to set. So far, so good! While the resin set, I began working on what would become the falling water. I began with some measurements of the lengths of the falling water needed. On a piece of wax paper I ran beads of Woodland Scenics Water Effects in varying widths and lengths. I used my finger to shape the beads into a thin sheet with some texture which would simulate falling water.

The Water Effects comes out as a white paste, but it dries clear after a day or so, depending upon the thickness. I later found that the when I pealed up the strips from the wax paper, a little of the wax coating came up too, making the clear material a little opaque. This was not too noticeable, but I started using a glass plate as my base.

While the Water Effects was still wet. I embedded some wisps of white poly fiber which would become the froth and splashing water. I varied the lengths of this, leaving some of the strip free of the fibers. After the water effects set up, I used some gloss Mod Podge to thicken up the fibers and mat them together to resemble the froth. Once this was all dry, I used white acrylic paint to highlight the raised areas. I made many of these strips, more than I needed.

I started by cutting the strip to the proper length, then placed it in position using Water Effects as adhesive.

Once I had placed all the strips and they were set, I used gloss Mod Podge applied to the surface of the water to add ripples to all the water. Water effects was used to add larger ripples which would represent the waves around the falls and turbulence around the rocks in the stream. After everything was dry, I added some highlights to the water with white acrylic paint.

